If you need help scanning on printer to computer, read Pixojet's guide 'How to scan on printer to computer' and get all the answers.
We have a guide for Canon, Brother, HP, Epson and Lexmark printers.

How to scan on Canon printer to computer
Do you have a Canon printer with a scan function, but you have asked yourself how to scan on a Canon printer? Then keep on reading. 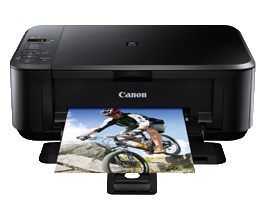
Just follow our step-by-step guide and in a few minutes you should be ready to scan on your Canon printer.
Step 1.
Start by connecting your All in One Canon printer to your desktop or laptop computer with the included USB power cable.
Step 2.
Install all the printer drivers, as without this, the computer will not be able to import the scanned images to your PC at a later time.
Step 3.
Turn on the printer and lift the scanners’ cover. Place the desired image or document face down in the upper left corner. Then close the cover again.
Step 4.
Find your Canon printer settings under the Home / Start button on your computer and open the folder.
In a few cases, there will be different settings for resp. the printer and its scanner, but most printers usually have the printer and scanner settings in one place.
Click on ‘Scan’ and select the appropriate Canon scanner from the list of printers.
Step 5.
Now select the document type you want to scan, the desired resolution, and the format in which you want to save the scanned file.
Then click the ‘Scan’ button and the desired image should then be scanned from your Canon printer to computer.
Step 6.
Give the scanned document / image a new title so you can quickly and easily find it again, whether you choose to save it on your desktop, in your images or in your document folder.
READ ALSO: Printer Paper - Which Type Should I Choose? (Link) 4
Wireless scan on Canon printer to computer
If you want to scan wirelessly on your Canon printer to computer, follow the steps:
Step 1.
Connect the printer to the same network that your PC is connected to on the printer display.
Since Canon printers can be a bit different depending on the model in question, you might need to read the included manual to see the very specific Wi-Fi instructions for your particular Canon printer.
Step 2.
Press the Scan button on your Canon printer to open the scan menu.
Step 3.
Use the up and down keys to select the computer to which the scanned image is to be sent to and the type of document you want to create.
Step 4.
Press the OK button and your selections will be saved.
Select whether you want color print by clicking Color or black print by clicking Black and the scanning will start.
Step 5.
The scanned image will now be displayed on the computer of your choice.
Then attach this image to an e-mail (your e-mail if it is your own Canon printer that you want to scan to) on your Canon printer, send e-mail and you will now receive an e-mail with the scanned document.

How to scan on Brother printer to computer
Are you going to scan a document or photo on a Brother printer to a computer and are unsure of how to do it? So read on below and get the answers. 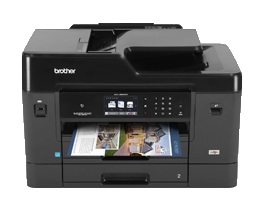
Step 1.
Lift the scanner cover and place your document or image on the scanners’ glass according to the correct instructions and close the cover again.
Step 2.
Click the Windows button on your computer, search for Brother, and then click on your printer model.
Step 3.
Select Control Center / Control Panel, then Scan and finally the type of document (e.g. image, text file, e-mail or folder) that you want to scan.
The scan is complete.
Step 4.
If necessary, edit resolution, type of file, colors etc. and subsequently save your scan in a favorite folder on your PC.
Wireless scan on Brother printer to computer
With most all-in-one Brother printers, you can scan directly from your Brother printer to your computer via a Scan-to-Email feature.
The process may vary slightly from printer model to printer model, but this guide should be of assistance to you no matter what type of Brother printer you have.
Prior to scanning, the printer driver software must be installed on your PC.
Step 1.
Place the desired document or image on the scanning surface under the cover according to the correct instructions (top left corner) with the print side down and close the cover again.
Step 2.
Press the printer's ‘Scan’ button and click ‘Scan-to-Email’ in the menu. Then select the e-mail to which your scan is to be sent to.
Step 3.
Finally, choose whether your scan should be Color or Black, and change the resolution if necessary.
Press Scan / Start and the scanned document or image is automatically attached and sent to the desired e-mail account.
READ ALSO: 'Best-in-Test' Photo Printers

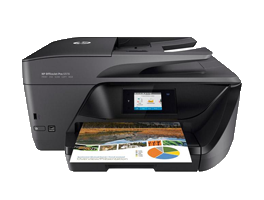
How to scan on HP printer to computer
If you have an HP printer and you want to know how to scan on HP printer to computer, read the guide below and you should be guided through the whole process.
Before you can perform a scan, you must have the printer's full-featured driver installed from the HP Web site and follow the setup manual to connect to the printer
If you have an HP printer launched in 2011 or later, select the recommended option, which includes HP scan software (outdated) ???
Step 1.
Lift the cover and place the document or image you want to scan on the scanners’ glass print side down. Finally, close the cover / scanner lid.
If your All in One HP printer is equipped with an automatic document feeder, you can also use it to scan multiple-page documents at once.
Step 2.
Search HP in the Windows / Home button, click on your printer's model name, and open the HP Printer Assistant.
Then click Scan a document or photo, and the HP Scan will open.
Step 3.
Select document type, edit resolution etc. if desired and then click Scan.
Step 4.
Finally, save your scan in a desired folder on your computer by clicking on Advanced Settings - Destination - Browse and then select the preferred folder.
Wireless scan on HP printer to computer
If you want to scan wirelessly and directly from your HP printer, do the following:
Step 1.
Press the printer's Scan button or scan menu on the display screen and select your computer and document type. Scanning is completed and the folder where the scan is saved automatically opens on your PC.
Step 2.
Now click on the Scan file and you will see a preview of your scan, after which you will save the file to your PC.
READ ALSO: Which printer is the cheapest to operate?

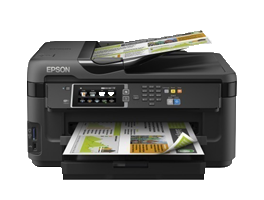
How to scan on Epson printer to computer
If you want to know more about how to scan on an Epson printer to a computer, then there is help to get below:
Step 1.
Place your document / image on the scanning surface under the cover following the correct instructions and print side down.
Step 2.
Click the Start / Windows button in the lower left corner of your PC and search for Epson. Next, select your printer model from the list of Epson printer devices.
Step 3.
Click the Scan option and select the desired document type.
You can now edit i.a. color mode, resolution, file type etc. and finally finish by pressing Scan at the bottom of the scanning settings.
The scan is completed and the scanned document is displayed on your computer screen, and you can now save the file to your computer.
Wireless scan on Epson printer to computer
Some Epson printers enable direct and wireless scanning to your computer, and if you are interested in knowing how to do that, read more below.
Prior to the wireless scan, you must have the printer driver software installed, which can usually be found on the printer manufacturer's website.
Step 1.
Open the scanner cover and set the document or image you want to scan from your Epson printer to your computer according to the correct instructions on the scanner glass.
Step 2.
Choose with the help of the printers’ up and down arrows Scan, click OK, and select your computer from the menu and press Start scan. The scan is now complete.
Step 3.
The folder with the automatically saved scan image now opens on your computer.
Click OK and your scan will appear on your PC and you can now save your file.
READ ALSO : Compatible Ink Cartridges - advantages and disadvantages

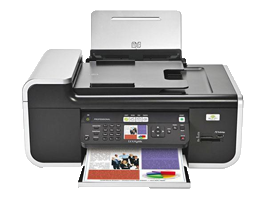
How to scan on a Lexmark printer to computer
If you need to scan on a Lexmark printer to a computer, but you are unsure of how to do it, here’s a step-by-step guide which can help you complete your scanning in just a few minutes.
Step 1.
Connect your printer to your computer and turn on the printer.
If you want to print wirelessly, be aware that the printer must be connected to the same Wi-Fi network as your computer.
If you have not already downloaded the printers’ driver software at this time, this must also be done before the scan can be completed.
Some operating systems also have Windows Fax and Scan, which is a free of charge software. If your PC has this software, you do not need to download the driver software for your Lexmark printer.
Step 2.
Then lift the scanner cover and place your document or image as instructed on the scanners’ glass with the print side down and close the cover again.
Step 3.
Press the Windows / Home button, search for Lexmark, and then select your printer model from the list of printer devices.
Step 4.
Click on the Scan option and select here which document type you want.
Also edit resolution, color mode etc. if you find it necessary, then press Scan.
Your document / image is now scanned and will be displayed on your PC.
Now you can save the document / image on your computer.
Wireless scan on a Lexmark printer to Computer
Step 1.
Place the desired document or photo on the scanners’ glass under the scanners’ lid in the upper left corner, side down, and close the cover again.
Step 2.
Press the printer's Scan button (if the printer does not have this button, use the up and down arrows to find the Scan function on the display).
Step 3.
Select your computer from the menu and start the scan by clicking Start Scan.
A folder will now open on your computer with the automatically attached document / image that has been scanned.
You can now save the file to your computer.